According to a study, around 57.4 million US households are using smart devices in 2022. This shows that smart devices are quickly taking over the market by storm, and a smart in-wall relay Homekit switch is no exception. These switches give you complete control over your home appliances and ensure you can monitor and manage them from a distance. Evvr is one of the best HomeKit switch, as it's affordable and more functional compared to other products in the same category.
However, before you pave the way for a smart home using Evvr Homekit switches, it's essential to understand a few things. You should know how an Evvr In-Wall Relay Homekit switch is installed and operated optimally to enjoy benefits to the fullest.
In case you are unaware of these things and want to get into the details, worry no more. We have covered everything from the compatibility of this in-wall relay switch to its advantages, operation, and differences from other hubs. So, let's dig further!
- What is Evvr In-Wall Relay Homekit Switch?
- How Does Evvr Homekit In-Wall Relay Switch Work?
- How to Wire Evvr Homekit In-Wall Relay Switch?
- Compatibility of Evvr Homekit In-Wall Relay Switch
- Differences between Evvr Homekit In-Wall Relay Switch from Other Products
- Differences from ZigBee, Z-Wave, and Homekit In-Wall Relay Switch with Benefits
What is Evvr In-Wall Relay Homekit Switch?
Until now, Evvr has launched three different versions of the Evvr smart in-wall relay switch. These include ZigBee 3.0, Z-Wave, and Homekit. You need separate hubs for the ZigBee and Z-Wave versions, so these options aren't suitable for people who want smart lighting and have a meager budget. The Evvr Homekit in-wall relay switch is the most cost-effective innovative home solution, and we are discussing it now!
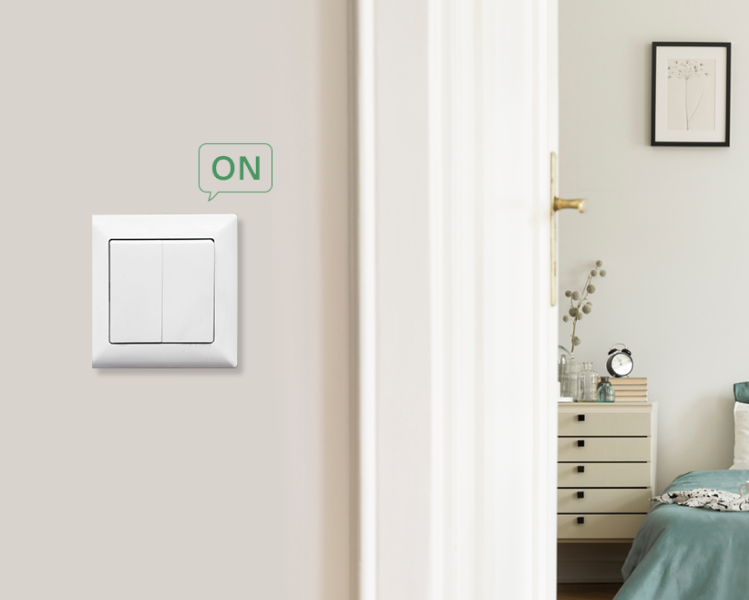
Evvr Homekit In-Wall Relay Switch is an exceptional no-neutral wire smart lighting product that works perfectly with old and new residential or commercial buildings. You don't need to upgrade your home's existing components to install this Homekit switch. This best HomeKit switch possesses a smart relay and a smart switch that bring you the best smart home lighting experience. There's no need for a separate hub for connectivity.

All you need to do is to connect the switch to your home's WiFi router and control it with your Apple device. In addition, this in-wall Homekit switch supports all types of bulbs and swiftly converts any multi or single-bulb system into smart lighting. The most prominent bulbs compatible with Evvr in-wall relay switches are incandescent, halogen, fluorescent, and LED.
How Does Evvr Homekit In-Wall Relay Switch Work?
Undoubtedly, smart relay switches are great if you have a home built in the 80s or 90s and can't bear the weight of more wire installation. With an Evvr in-wall relay switch, there's no need for extra high-amperage switches and wiring. It's because this relay switch works utilizing the electromagnetic mechanism. In simple words, an Evvr in-wall relay switch is turned off and on with a magnet. When current flows through the controller, the magnet present inside attracts the iron armature.
This attraction pushes the other end of the switch together and results in the completion of the circuit. Hence, current flows throughout the circuit, turning your Evvr in-wall relay switch on. Another noticeable thing about this Evvr switch is that it doesn't matter if the switch button is physically off; you can control your home lighting with this relay switch as long as the current flows. The operational working of an Evvr in-wall relay switch is also simple, follow the below-given steps, and you are all set to go!
Operating Instructions
- First, you need to set the smart relay into setup mode by pressing the reset button on the device. If the switch isn't already added to the Homekit network, it'll take at least 10 minutes for it to go into the setup mode every time it's rebooted.
- After that, open the Apple Home App on iOS or any other Apple device and go to the "add accessory" option.
- Next, scan the QR code on the switch box and click the "add to home" option.
- Select the location in your app where you want to add it, and then name the switch to make the connection easy for next time.
How to Know If Your Evvr Homekit In-Wall Relay Switch is Working Fine?
To ensure the Evvr in-wall relay Homekit switch works smoothly, keep the WiFi router close and use an Apple device, Siri, or Alexa to give necessary instructions. But how do you know if the smart relay Homekit switch has a stable connection or not? Evvr understood this issue, and that's why it embedded an LED light into the switch that turns red when there's a failed internet connection and blue if the relay switch has a steady connection.
|
Color and Activity |
WiFi Connection |
Homekit Connection |
|
Blue Glowing |
Available |
Available |
|
Red Glowing |
Unavailable |
Unavailable |
|
Red Flashing |
Unavailable |
Available |
|
Red Double Flashing |
Available |
Unavailable |
How to Switch Between Different Switching Modes?
The changing of switching modes in an Evvr Homekit In-Wall Relay Switch isn't difficult. The below-given table shows different switches, their status, and how to identify them through indicator color changings:
|
Switch |
Indicator |
|
Toggle switch - the device changes its status as soon as the switch's status is changed |
Indicator will show purple color once |
|
Toggle switch - device turns on when contact is closed and off when it's opened. |
The indicator will show purple color twice |
|
Momentary Switch |
Indicator will show purple color three times |
How to Wire Evvr Homekit In-Wall Relay Switch?
Many people think installing in-wall relay switches is difficult as they have huge sizes. However, this isn't the case with an Evvr in-wall relay switch because the company's main focus was to introduce a product that's small in size and easy to install. It's a two-part device: smart relay and switch.
There's also an optional sub-assembly for users who want to control the Homekit switch with network commands even when the lights are turned off through the mechanical panel. Let's have a look at the accessories you need for Evvr in-wall relay Homekit switch installation:
Accessories or Tools
- Fixing Screw
- Double Sided Foam Pad
- Smart Relay Switch
- Screwdriver
- Sub Assembly
- Two Panel Connector Wires
Instructions
Step 1: First, turn off the power by a breaker or electrical service panel before proceeding to the installation process, or you'll risk getting electrocuted.
Step 2: Next, add the sub-assembly to your switch. Remove the cover of the fixture using a screwdriver and see the exact location where you'll be installing the sub-assembly. For instance, if you have a 3-way gang switch, the Evvr sub-assembly can easily slip in the middle.
However, before inserting it take the connector wires and add them into the SW1 for the load. After that, separate two wires from the switch and connect the live wire to the L connector and the neutral wire to the L1 connector. Now, utilize the other panel connector wire connected to the light switch. Fix the sub-assembly in the box's inner walls and close the switch box.
Step 3: The third step is installing the Homekit smart relay switch. You've to remove the cover of a nearby light fixture and remove the two wires that go to the light bulb. Now connect the live wire to the L connector and the neutral wire to the N connector. Lastly, stick the smart relay on the foam pad and place that relay on a clean surface. Turn the power on and check if the switch is working fine or not.
Follow the above-mentioned operating instructions to control the Evvr Homekit light switch through your Apple devices!
Compatibility of Evvr Homekit In-Wall Relay Switch
It may surprise you, but Evvr Homekit light smart switch isn't only limited to lighting automation. Instead, this smart switch is designed to fit ideally other smart devices to realize the curtain control, ventilation system control, door lock control, etc. So, if you want complete control over other gadgets or appliances but don't want any extra wire to take away the aesthetic look of your home, the Evvr smart in-wall relay switch is the best HomeKit switch.
Evvr In-Wall Relay Switch has its high product quality since it has been trusted with various certificates from different regions and meets most certification requirements like Zigbee, Z-Wave, and HomeKit.
It's because it blends perfectly in your home and doesn't need any neutral wire for installation. Additionally, in case your home or commercial building is built in the 1980s, the Evvr in-wall Homekit switch is the only compatible device that's cost-effective. It doesn't need upgrading any part of the building for installation.
Differences between Evvr Homekit In-Wall Relay Switch from Other Products
Certain factors make the Evvr Homekit switch different from other products in this category. Let's look at a few of them:
No Minimum Load Requirements
Almost all other relay switches in the market have some minimum load requirement and start flickering if it gets connected to a low power required. However, the Evvr Homekit button differs from others and has no specific no-load requirement. Therefore, you can use it with any bulb and don't have to worry about flickering. It also comes with overload protection that immediately stops the circuit when the voltage is overloaded.
Doesn't Need a Neutral Wire
Often, old homeowners fail to install smart switches as they come with a bundle of wires that must be installed, disturbing the building's structure. The in-wall relay Homekit switch works without a neutral wire, with its unique split-type design with the smart relay and the exceptionally small smart switch, it is easily fixed in any of the existing switch boxes. This opened doors for smart automation for homes built in the 90s. What's the best part? The Evvr Homekit smart switch doesn't compromise functionality and has a voltage limit of 600W.
Differences from ZigBee, Z-Wave, and Homekit In-Wall Relay Switch with Benefits
The ZigBee switch is one that works with a ZigBee Hub and allows you to control the home's lighting with a simple touch. All you need to do is to install a smart in-wall relay switch and connect it with the ZigBee Hub. Use any ZigBee-compatible app to adjust the lighting hassle-free. What makes ZigBee the best is that it has a vast data transmission range and offers excellent stability to your lighting automation system. Z-Wave also works like ZigBee, but its transmission range is small, and signals may start dissipating from a distance.
Both ZigBee and Z-Wave need a separate hub that can be heavy on your pocket. In contrast, Homekit smart switch is different because it connects to your WiFi router and doesn't need a separate hub. This means the Homekit walk switch not only provides greater stability and extra signal strength but is also cost-effective. Connect it with the WiFi and control the lighting using your Apple devices like iPhone, iPad, etc.
Evvr provides the excellent smart lighting product In-Wall Relay Switch compatible with Zigbee, Z-Wave and HomeKit Version.
|
|
HomeKit Version |
Zigbee Version |
|
Gateway required or not |
Not necessarily required |
Required |
|
Installation of third-party app or not |
Not Required |
Required |
|
Price |
High |
Low |
|
Communication Protocol |
WiFi |
Zigbee 3.0 |
|
Communication Range |
50-80m |
30-60m |
|
Signal Coverage Difficulty |
Easy |
Difficult |
|
Signal Coverage Cost |
Low |
High |
|
Compatibility with third-party gateways |
Incompatible |
Compatible |
Conclusion
Whether you have an old home or a new building, Evvr Homekit In-Wall Relay Switch is the best solution for home automation. The product offers great features like no minimum load requirement, doesn't need neutral wire, and there are no compromises on your safety. install this Homekit switch and connect it to a stable internet connection to use it to the fullest. What's the best part? It's budget-friendly and works with other home appliances efficiently. So, don't wait and become our partner now!